[1] 38.82397In the previous chapter, we created a simple Quarto document with R code chunks. By default, Quarto shows both the code and its output. But in a professional report, you often want more control - hide the code, suppress warnings, or show only certain outputs. This is where chunk options come in.
The basics of chunk options
Chunk options are specified at the top of a code chunk using the #| syntax (read as “hash-pipe”). Each option goes on its own line:
```{r}
#| label: my-chunk
#| echo: false
#| message: false

library(tidyverse)
```
This syntax is specific to Quarto. If you have used R Markdown before, you may remember the old style {r echo=FALSE} - that still works, but the new #| style is cleaner and more readable.
The most important chunk options
Here are the chunk options you will use most frequently:
echo - Show or hide code
The echo option controls whether the code itself appears in the output.
| Setting | Code visible? | Output visible? |
|---|---|---|
echo: true (default) |
Yes | Yes |
echo: false |
No | Yes |
Use case: In a report for non-technical readers, you typically want echo: false - they care about results, not code.
The code that produced this output was hidden using #| echo: false.
eval - Run or skip code
The eval option controls whether the code is executed at all.
| Setting | Code runs? | Output produced? |
|---|---|---|
eval: true (default) |
Yes | Yes |
eval: false |
No | No |
Use case: Show example code without running it, or temporarily disable a slow computation.
```{r}
#| eval: false
# This code is displayed but not executed
very_slow_computation()
```
include - The nuclear option
The include option is a shortcut that hides everything - code, output, messages, warnings.
| Setting | Anything visible? |
|---|---|
include: true (default) |
Yes |
include: false |
No (but code still runs!) |
Use case: Setup chunks that load packages or prepare data. The code runs, but nothing clutters your document.
The chunk above ran silently. We can use its result: 84.
message and warning - Suppress notifications
R functions often produce messages and warnings. These are helpful during development but distracting in a final report.
Attache Paket: 'scales'Das folgende Objekt ist maskiert 'package:purrr':
discardDas folgende Objekt ist maskiert 'package:readr':
col_factorTo suppress these:
```{r}
#| message: false
#| warning: false
library(scales)
```
Tip
For package loading, I recommend always using message: false. The “Attaching package” messages are rarely useful in a report.
output - Control output format
The output option has several settings, but the most useful one is asis:
| Setting | Behavior |
|---|---|
output: true (default) |
Normal output |
output: false |
Hide output |
output: asis |
Treat output as raw Markdown/HTML |
Use case: output: asis is essential when using packages like flextable that produce formatted output. We will use this extensively in Chapter 5.
Setting global options
If you want the same options for all chunks in your document, you can set them globally in the YAML header:
---
title: "My Report"
format: docx
execute:
  echo: false
  warning: false
  message: false
---
Now all chunks will hide code and suppress warnings/messages by default. You can still override these settings in individual chunks.
Note
For professional reports, I typically use these global settings and only show code when it is pedagogically useful.
Chunk labels
Every chunk should have a label. This serves several purposes:
- Navigation: RStudio shows labeled chunks in the document outline
- Debugging: Error messages reference the chunk label
- Cross-references: You can reference figures and tables by their label (Chapter 7)
```{r}
#| label: summary-statistics
mean(adelie$bill_length_mm)
```
Label rules:
- Use lowercase letters, numbers, and hyphens (e.g.,
summary-statistics) - Avoid spaces (labels with spaces will cause errors)
- Underscores work but hyphens are the recommended convention
- Must be unique within the document
- For this project, prefix with
qrt-for uniqueness across chapters
Quick reference table
| Option | Purpose | Common values |
|---|---|---|
echo |
Show code? |
true, false
|
eval |
Run code? |
true, false
|
include |
Show anything? |
true, false
|
output |
Show output? |
true, false, asis
|
message |
Show messages? |
true, false
|
warning |
Show warnings? |
true, false
|
error |
Continue on error? |
true, false
|
label |
Chunk identifier | any valid name |
For the complete list of options, see the Quarto documentation on code cells.
Practical example
Here is how a typical report setup might look:
---
title: "Penguin Analysis"
format: docx
execute:
  echo: false
  warning: false
  message: false
---

```{r}
#| label: setup
#| include: false
library(tidyverse)
library(palmerpenguins)
library(flextable)

adelie <- penguins %>%
  filter(species == "Adelie") %>%
  drop_na()
```

# Introduction

This report analyzes 146 Adelie penguins.

```{r}
#| label: summary-table
#| output: asis
adelie %>%
  summarise(
    n = n(),
    mean_bill = mean(bill_length_mm),
    sd_bill = sd(bill_length_mm)
  ) %>%
  flextable()
```
When rendered to Word, only the text and the formatted table appear - no code, no messages:
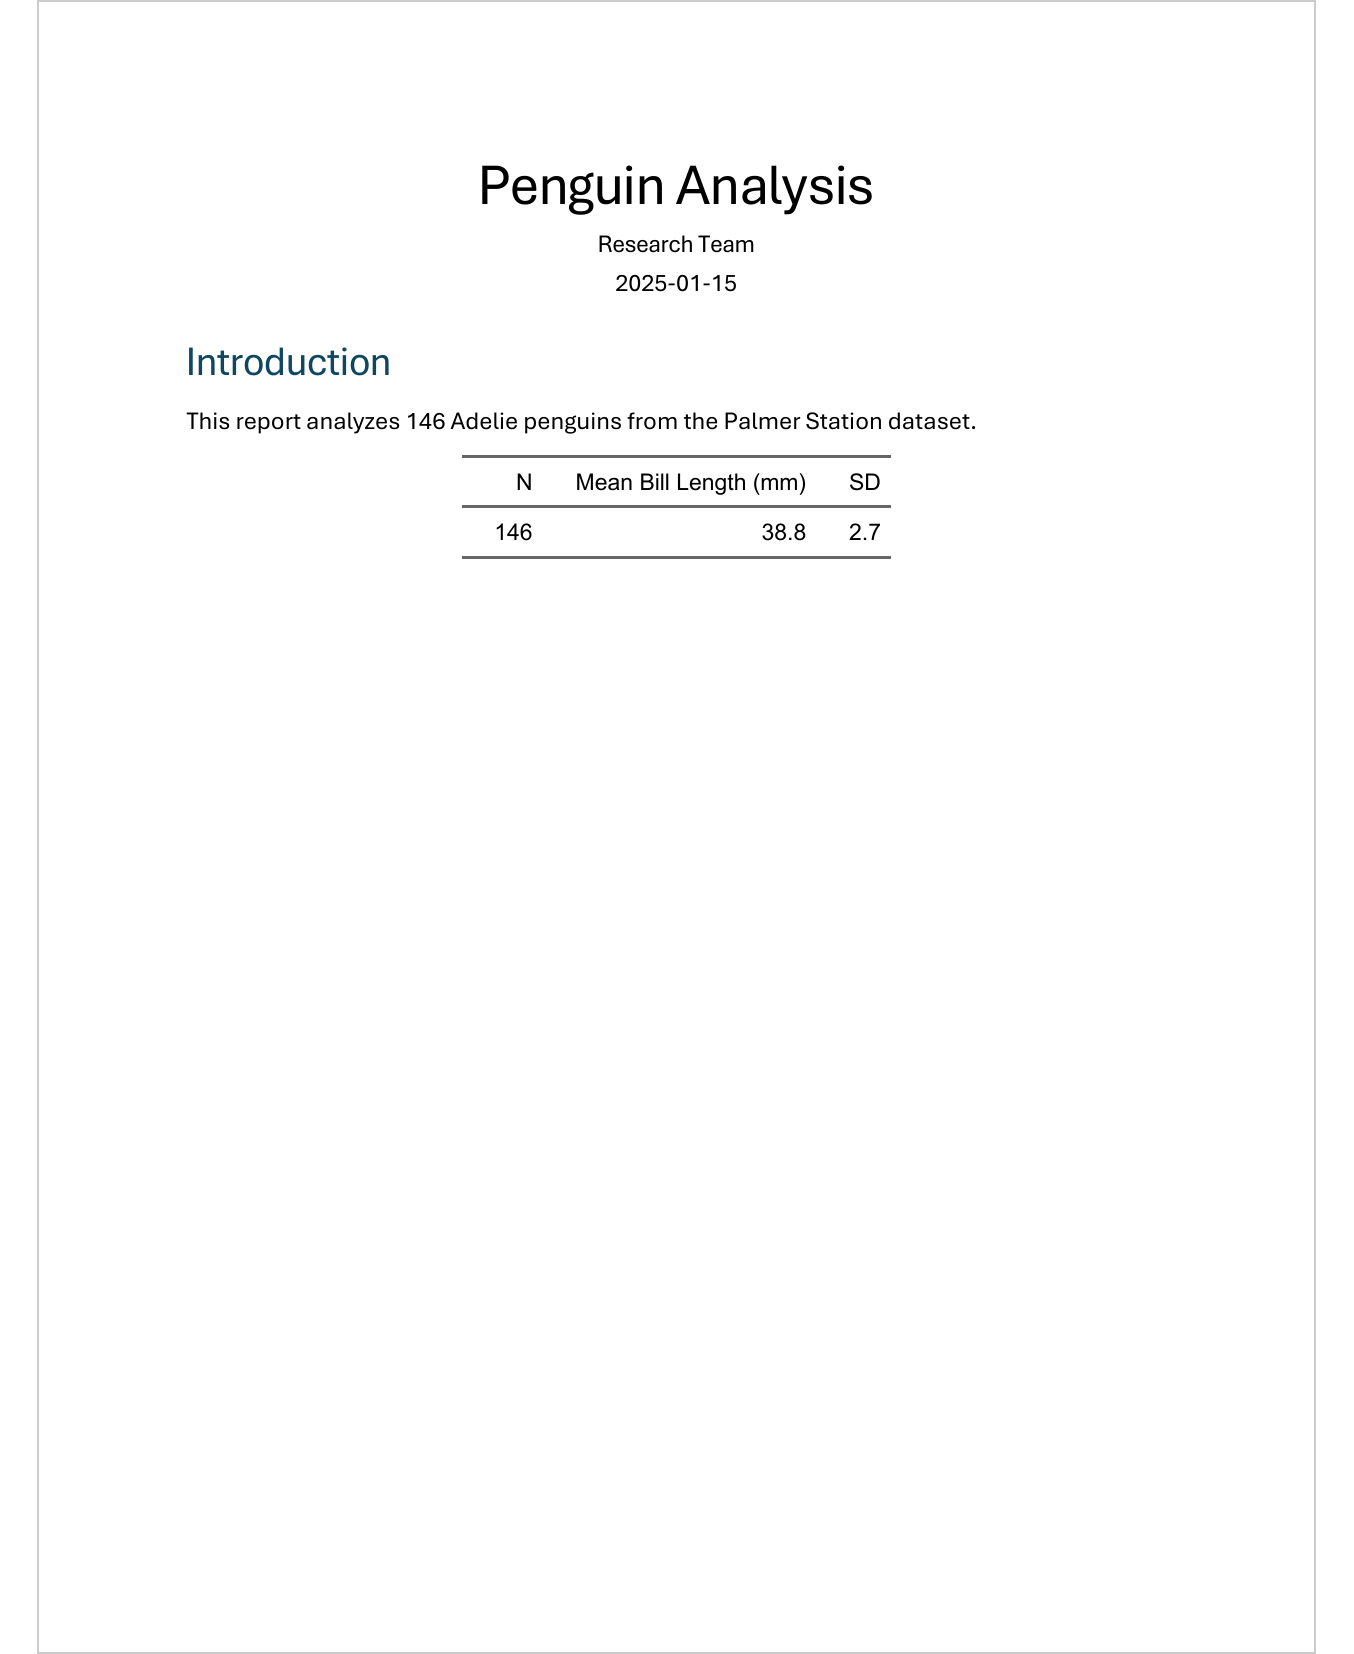
In this setup:
- Global options hide code and suppress messages for all chunks
- The setup chunk uses
include: falseto run silently - The summary table uses
output: asisfor proper flextable rendering
TipExercise: Control your output
- Take the document from Chapter 2
- Add
execute:options to the YAML header to hide all code by default - Add a setup chunk with
include: falsefor package loading - Verify that the rendered Word document shows only results, not code
What is next
Now that you can control what appears in your document, the next step is making it look professional. In Chapter 4, we will learn how to use Word templates to apply consistent formatting - fonts, colors, heading styles, and more.
Citation
BibTeX citation:
@online{schmidt2026,
  author = {{Dr. Paul Schmidt}},
  publisher = {BioMath GmbH},
  title = {3. {Chunk} {Options}},
  date = {2026-03-12},
  url = {https://biomathcontent.netlify.app/content/quarto/03_chunk_options.html},
  langid = {en}
}
For attribution, please cite this work as:
Dr. Paul Schmidt. 2026. “3. Chunk Options.” BioMath GmbH.
March 12, 2026. https://biomathcontent.netlify.app/content/quarto/03_chunk_options.html.